Tips

Friday, January 11, 2013

USB disk Security 6.2.0.30

From Zbshareware Lab:

USB Disk Security provides protection against any malicious programs trying to attack via USB drive. It delivers high level of protection against theft and accidental disclosure of confidential data, and prevents unauthorized persons from stealing your data. USB Disk Security is the best security software to protect offline computer without the need for signature updates. This light and easy to use solution is compatible with other antivirus software and doesn't slow down your computer at all.

What's new in this version: Version 6.2.0.30 fixes some bugs in the installation.

USB disk full version download here

Thursday, January 10, 2013

Removing your Windows 7 installation, partition

This process is essentially the same as the previous page, but using the third-party tool GParted instead of Windows’ Disk Management utility. Be sure to have your XP CD on-hand to repair potential boot loader complications.

Download the latest copy of GParted here, and then burn it to a disc as an image file. 

After you've downloaded and burned your image of GParted, pop it into your optical drive and reboot. Shortly after booting off the disc you'll have to choose your preferred language, keymap and screen resolution.

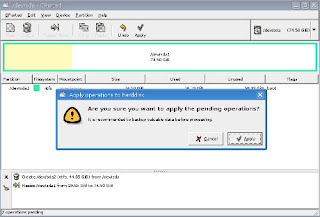
Once the partition software has loaded, right click the partition where Windows 7 resides (it's probably the second partition on “dev/hda1” if you followed our previous guide) and choose “Delete”. You should now see unallocated space on your hard drive where Windows 7 once called home.

Right click your original (and likely only remaining) partition, choose “Resize/Move” and fill in 0 for both the free space preceding and following to occupy the entire unallocated space.
 Be sure to click apply up top or no changes will be made.
Repairing XP's boot loader:

Now, you may or may not be able to boot into XP as you've just potentially botched your boot loader (don't worry). Even if you can access XP and want to get rid of the OS selection during boot up continue reading.
Boot using your Windows XP CD and after the initial loading process you should be met with three options; “Enter” to setup Windows, “R” to load the Recovery Console and “F3” to quit without doing anything. We want to hit “R”.
The Recovery Console will search for instances of Windows and ask you to select one (there will probably only be one). Enter the number pertaining to your XP installation, and you'll be prompted for the Administrator password (if you're not sure what it is you likely don't have one, just hit enter).
Now, enter “fixmbr” (confirm with “y”) and upon completion enter “fixboot” (confirm with “y”).
 Enter “exit” to reboot your system. Remove your XP CD and you should be good to go.
Done.

Dead Power Supply Unit (PSU)? How to be sure ?

So you turn on the computer and nothing happens, it could be a broken case switch and therefore the PSU never gets the signal to turn on. Or it could be a dead PSU or something else dead pulling down the output of the PSU.

 Here's what you do:

1) Unplug the leads to the case switch at the mobo and jumper them with a small piece of wire. Now turn on the main power switch at the back of the PSU. If nothing happens, we're a long way to proving the PSU is dead.

2) If above procedure caused nothing to happen, now we get a little more into it. Remove the 20pin PSU connector and the 4pin CPU connector to the mobo, all other psu connections can stay put. Using a small wire (a paper clip will do) jumper pins 14(the only green wire) and any BLACK wire (let's say pin 13 or 15) on the 20 pin PSU connector. Now turn on the main PSU switch. Your PSU should come to life (HDD spins up, and fans spin).

Below is a pic of the 20 pin connector 
From the pic you can see that pins 13 and 15 are ground pins, that's why you can use either one. You want to ground pin 14.
This is all the case switch does via mobo traces out to the case switch leads. Well it does go thru a FET or Bipolar transistor to make the actual connection, this is how Windows can soft shut down the PC.

3) If nothing still happens then start removing 4 pin molexs one at a time, starting with the video card (if it has one). This will eliminate any peripherals "holding" or "pulling" down the PSU. After all connections are removed and still nothing, then your PSU is dead for sure.

4) Edit: I forgot this possibility. If after step 2, all fans spin up and HDD spins, but at step 1 nothing works, then it's most likely a faulty mobo. And most likely that little FET or Bipolar transistor or at least the circuit that turns that on. Either way at this point you're best to take it in for service or RMA your mobo back if applicable.

Hope this helps

Thursday, December 27, 2012

Windows Password Resetter

Download this :
Hp USB Format Utility
KonBOOT
uNETbootin for windows

Instruction how to use:

Install Hp USB format utility tool
Note: You need to have a administrator privilage to install and format your USB drive.

Reformat your USB drive in FAT32 format. (1gb or higher)
Note: FAT32 format is important when we use a Boot Image Loader.

Open uNETbootin.exe
Follow this picture settings.
Locate the FD0-konboot-v1.1-2in1.img inside the FD0-konboot-v1.1-2in1 folder then press OK button.

Wait until the installation is finish and the windows like this appear... Then choose Reboot now.

After Reboot press F12 or F2 or F10 or del to boot enter Menu.
Then choose boot on USB-FDD or USB-HDD.

And you should see this Linux Configuration Windows. Just press Enter or just wait the countdown reach to zero.


When you see this kryptos logic windows just press enter.

It will redirect you to this windows.

After the bootingup... EOT it will loop you back to linux configuration windows.. all you need to do is to UPLUG or get your USB.. it will give you some error after you unplug your USB...but that's okay just press Enter and it will boot you to windows...

Done.. you don't need to enter password to Administrator forgotten password Account...
Enjoy :)

Friday, December 7, 2012

How to Recover DELETED Files

How to Recover Deleted Fils on the Hard disk drive, Solid state drive, USB flash, or other storage media?

Your computer crashed and may Hard disk drive is failing. So you need to backup the files and replace it immediately. But when you try to recover some files, it cannot be detected or cannot be recovered.

Luckily, I found this software, which is also you need to recover most of your files, and even deleted files are still can be recovered by using this data recovery software.

Here’s steps / instructions on how to recover deleted files :

Download this Software link 
Instruction for Software try to leave your comment below.


Go to File > click Open


Select Logical Drive / Hard disk drive to recover files. Click OK after selecting a logical drive. Then Scan Root Directory runs. Wait until scanning is finish.


Select Cluster Range to search. This means where the search scanning, shall begin and end its search. (But frankly for effectivity, I do the search from the beginning to last, it will take longer, depends on the capacity of your hard disk drive you selected.) Click OK.


Cluster Scan begins. 
(Tip : If there were found deleted directories or files, I end immediately the cluster scan by pressing cancel. For some reasons, it works and the directories or files are found that I need to recover).


Finally..


Hope it I able to help up you out !

Laptop FAN problem spin

Some people ask me regarding this matter. “Why My Laptop CPU Fan Doesn’t Spin”, “Does it needs replacement?” I’ll give an answer. “Don’t Panic!” 

First of all, for some reasons, why laptop cpu fan doesn’t spin is because, like Dell Latitude C600/C500 for instance, when I boot up and power on, when I check the laptop cpu fan, it doesn’t spin up. 

The true reason is that, there are some Motherboards / Laptops, the laptop cpu fan doesn’t spin until it reaches certain amount of cpu temperature. For instance, my Dell Latitude C600/C500, it will only starts to spin when it reaches 70 celcius cpu temperature.

I think there are other laptops, in which there cpu’s fan doesn’t spin. If your in doubt, try to stress your cpu. For instance, put up or open up some applications then see if that’s workout.

I suggest also to put Motherboard / CPU temperature monitor, this will help you determine when your laptop reaches certain amount of cpu temperature.

There are tons of software that can be used, use google to search for it.

I’ll give you two applications I used to stress my cpu, and also to monitor the cpu temperature.
1. I8KfanGUI – For Dell Inspiron/Latitude/Precision fan control utility (for Dell)
2. Prime95 – CPU Stress Test Software / CPU Stability Test

cheer :)

Windows 7 won’t startup or startup repair can’t fix

There are several reasons why it can’t boot or startup to Windows 7. It can be corrupted systems files, it can be the boot loader has some problems or the startup system files has an issue and need to be resolved.

Here’s the guide/tips to easily fix the Windows 7 that won’t startup or bootup:

1. At the boot of the computer, if the Windows 7 prompts an option regarding couldn’t startup because there is a problem. You can fix it, but first make the cdrom media drive be the first drive to boot and then insert the Windows 7 installation disc or if you have Windows 7 via USB (if you’re computer supports USB Bootup). Then choose Repair your computer and then Startup Repair.


Startup Repair and Boot Loader Fix in Windows 7

Startup Repair and Boot Loader Fix in Windows 7


Startup Repair and Boot Loader Fix in Windows 7

Startup Repair and Boot Loader Fix in Windows 7

Note: It will take a while before it fixes the issue. Then it will ask to restart your computer.

2. If doesn’t fix the issue. Another method is to press F8 for Advanced Boot Options. You can activate the menu, when the computer bootup, and then before Windows 7 starts.

In here it will give you more options or menu, if you having issues on logging to Windows 7.

Repair your Computer same as the previous method. (Windows 7 Installation disc needed)
Safe Mode, Safe Mode with Networking, Safe Mode with Command Prompt.
Enable boot logging, Enable low resolution (640×480).
Last Known Good Configuration(advanced).
Directory services restore mode.
Debugging mode.
Disable automatic restart on system failure.
Disable Driver Signature Enforcement.
Start Windows Normally.

Try first the Safety Mode, then if doesn’t boot up, try the Last Known Good Configuration.

2. You can also try other methods, again, if still doesn’t work on the previous fix/method. Insert the Windows 7 installation disc, make it as first boot drive, then choose again Repair your computer.

From here, used the command prompt, it may be the problem is on the boot loader or MBR (Master Boot Record), after your login on the command prompt, to restore the MBR type:
 Startup Repair and Boot Loader Fix in Windows 7

bootrec /fixmbr Startup Repair and Boot Loader Fix in Windows 7

you can also try the bootrec /fixboot, to restore or write new boot sector into the system partition.

3. Type the bootrec /? for more options and to see compatible solution to your issue.

 Startup Repair and Boot Loader Fix in Windows 7

(Note: Microsoft(Windows 7 OS) Logo/Images/Pictures has a respective copyright. I used it for demonstration purpose only.)
:)