Found this info from VGA Source.
Here's some info about what the HD4xxx cards that use from the 12v rail :-
Wattage and Current Draw -- Idle / Load
Sapphire Radeon HD 4670 -- 10W / 70W .. 0.8A / 5.8A
Sapphire Radeon HD 4770 -- 40W / 120W .. 3.3A / 10A
Sapphire Radeon HD 4850 -- 60W / 190W .. 5A / 15.8A
Sapphire Radeon HD 4850X2 -- 75W / 180W .. 6.25 / 15A
Sapphire Radeon HD 4850 CrossFire -- 125W / 210W .. 10.4A / 17.5A
Sapphire Radeon HD 4870 -- 60W / 165W .. 5A / 13.75A
Sapphire Radeon HD 4870 Toxic -- 70W / 185W .. 5.8A / 15.4A
Sapphire Radeon HD 4870 Toxic CrossFire -- 180W / 305W .. 15A / 25.4A
Sapphire Radeon HD 4870X2 -- 100W / 320W .. 8.3A / 26.6A
Sapphire Radeon HD 4870X2 Atomic -- 70W / 255W .. 5.8A / 18.75A
Sapphire Radeon HD 4890 -- 65W / 270W .. 5.4A / 22.5A
Sapphire Radeon HD 4890 Toxic -- 65W / 320W .. 5.4A / 26.6A
Note: this is what the video card uses, it does not include all other components in the system

Friday, December 30, 2011
What Power Supply should I get? How many Watts? Who made it? Guide Inside.
Table of Contents:
-Five Important Rules to follow for Power Supply Unit (PSU) selection
-Good/Bad Units List
-General wattage calculator
-Further Links
-Who Really Made this Power Supply Unit? (thanks to flazing1)
-Notes
This is the third major revision of the PSU guide, originally written by bigandy, revised by fedz, and heavily modified with multiple user contributions as presented before you here. It takes into account all the comments posted. Also, read the disclaimer at the bottom.
Copyright Notice: You MAY NOT re-post or redistribute any distinct portion of this thread (or its preceding revisions, as linked in the previous paragraph) in any form without proper credit. Please private message the original poster of this thread (kram 2.0) with comments, questions, inquiries, etc. Thanks!
Five Important Rules to follow for Power Supply Unit (PSU) selection:
In no particular order
1) Do NOT skimp on the power supply unit - you are entrusting an expensive investment you've made in your computer to this unit.
2) Brand/Manufacturer reputation is VERY important
3) Rated/Advertised Wattage is NOT an indicator of quality or unit power.
4) Do NOT trust a PSU that weighs less than your CPU to power your system.
5) Research - let others do the testing for you and read about them. That's what this thread is for.
NOTE: To emphasize the point, "reputable" generally refers to companies that make high quality units while "Less Reputable" refers to manufacturers that produce normally faulty units. Like with any electronic product, there is a chance of failure with any unit, so please keep that in mind as you shop for a power supply unit.
General PSU Calculators:
Please note these should be used as GUIDES - as noted on their disclaimers, they cannot take into account every component, every part that is drawing power. As a general guidelines, it's a good idea to marginally overshoot the calculated wattage in order to cover for the entire system.
Newegg Power Supply Calculator
eXtreme PSU Calculator
Load on 12V Rail for Common ATI HDx Graphics Cards (originally from VGA Source)
http://www.jscustompcs.com/power_supply/
http://www.pcpowercooling.com/maxpc/cases.htm
Further links:
- PSU's inside manufacturer's cases, like Dell or HP, can sometimes use power supply units that may or may not be sufficient to allow for upgrades. In other words, you may need to upgrade your PSU in the real chance that the unit cannot handle the added load. Take note, and do your research first.
- Dell has often been using PC P&C for their PSU. HP, eMachine, Compaq, and Gateway USUALLY use either/or Bestec and Hipro.
- With modular power supplies, avoid lower-quality models that normally come with lower price tags. Like with normal attached units, reputable brands will perform.
-Five Important Rules to follow for Power Supply Unit (PSU) selection
-Good/Bad Units List
-General wattage calculator
-Further Links
-Who Really Made this Power Supply Unit? (thanks to flazing1)
-Notes
This is the third major revision of the PSU guide, originally written by bigandy, revised by fedz, and heavily modified with multiple user contributions as presented before you here. It takes into account all the comments posted. Also, read the disclaimer at the bottom.
Copyright Notice: You MAY NOT re-post or redistribute any distinct portion of this thread (or its preceding revisions, as linked in the previous paragraph) in any form without proper credit. Please private message the original poster of this thread (kram 2.0) with comments, questions, inquiries, etc. Thanks!
Five Important Rules to follow for Power Supply Unit (PSU) selection:
In no particular order
1) Do NOT skimp on the power supply unit - you are entrusting an expensive investment you've made in your computer to this unit.
2) Brand/Manufacturer reputation is VERY important
3) Rated/Advertised Wattage is NOT an indicator of quality or unit power.
4) Do NOT trust a PSU that weighs less than your CPU to power your system.
5) Research - let others do the testing for you and read about them. That's what this thread is for.
NOTE: To emphasize the point, "reputable" generally refers to companies that make high quality units while "Less Reputable" refers to manufacturers that produce normally faulty units. Like with any electronic product, there is a chance of failure with any unit, so please keep that in mind as you shop for a power supply unit.
Top quality PSU's in blue bold, high quality in blue - for high-end builds. Note that external hyperlinks are also blue on most browsers, but usually also underlined. AMS Akasa (PowerGreen, Power+) Antec (almost all models) AOpen (select models) BFG Technologies (800W model) Channel Well Chieftec (non-bundled) Cooler Master (UCP) Corsair (Best PSU Manf., CustomPC) Delta E-Power Enermax Enlight Fortron Source Hi-Power Jeantech Mushkin OCZ (EliteXStream, EvoStream, ProXStream) PCMCIS PC Power & Cooling PowerMan Raidmax (ONLY select models from Tagan/Topower) Seasonic SilenX Silverstone (ZF, ZM) Sparkle Tagan Thermaltake (select models) TTGI/SuperFlower (select models) Tuniq Verax Xclio (only GreatPower) Zalman | Questionable/Less Reputable: Achieve Allied Apevia (formerly Aspire, same quality) Bestec Codegen CoolMax Cyberzone DEER Dragon Eagle Tech EYE-T Foxconn Greenline Hiper (most low-wattage models) HIPRO JSP-tech KingStar Kingwin L&C Linkworld Okia Orion PowerMagic PowerTek PowerUp Powmax Q-Tec Raidmax (almost all non Tagan/Topower) Rosewill Skyhawk Startech Turbolink Ultra (esp. X-Connect) Win Xion Youngyear | Not Enough Info/Undetermined: AGPB Ahanix Astec Broadway Com (mixed bag) Dynapower USA Gigabyte HEC Levicom Mad Dog (mixed bag results) NSpire Soyo Vantec (mixed reviews) |
General PSU Calculators:
Please note these should be used as GUIDES - as noted on their disclaimers, they cannot take into account every component, every part that is drawing power. As a general guidelines, it's a good idea to marginally overshoot the calculated wattage in order to cover for the entire system.
Newegg Power Supply Calculator
eXtreme PSU Calculator
Load on 12V Rail for Common ATI HDx Graphics Cards (originally from VGA Source)
http://www.jscustompcs.com/power_supply/
http://www.pcpowercooling.com/maxpc/cases.htm
Further links:
- Tom's Hardware: Who's Who In Power Supplies: Brands, Labels, And OEMs (thanks to EzyStvy)
- FiringSquad PSU Unofficial Listing
- JonnyGURU's Bargain Basement PSU Review
- HardOCP: Five $50 Power Supplies Tested (thanks to Cricket. glc: "Yet another Deer literally blows up.........")
- HardOCP: 450W-500W Battle Royale (Apevia PSU disintegrates during test)
- Directron: Weight vs. Power Efficiency
- nVidia Forums: The Who and Why of Power Supplies, With purchasing suggestions
- Who Really Made this Power Supply Unit?
- Tom's Hardware: Deceptive ratings: 21 PSU's compared
- Tom's Hardware: High-End PSU Comparison
- Tom's Hardware: Power Supplies Under Full Load
- PC Stats: Most common ways to kill a PC
- PSU's inside manufacturer's cases, like Dell or HP, can sometimes use power supply units that may or may not be sufficient to allow for upgrades. In other words, you may need to upgrade your PSU in the real chance that the unit cannot handle the added load. Take note, and do your research first.
- Dell has often been using PC P&C for their PSU. HP, eMachine, Compaq, and Gateway USUALLY use either/or Bestec and Hipro.
- With modular power supplies, avoid lower-quality models that normally come with lower price tags. Like with normal attached units, reputable brands will perform.
Tuesday, December 20, 2011
How to FIX Task Manager in Window XP
Windows Task Manager is a inbuilt program where you can check what processes are currently running on your computer system, you can also set priority of these processes. This is very helpful when you have to start or end any task or process forcefully. Task Manager can also be used to monitor RAM usage by CPU and its performance .Viruses and trojans can disable your Task Manager and you will get an error message.


Select Not Configured option and click on OK button.

 Now expand Registry Keys as
HKEY_CURRENT_USER\Software\Microsoft\Windows\CurrentVersion\Policies\System
In the Right window pane look for the DisableTaskMgr. Right click on it and click on Delete.
 Confirm the Delete message and your Task Manager will available once again.
Restart now..
Enjoy !

Different Methods to FIX Task Manager
Method 1: By Enabling it Manually
- Open Run command [Win+R].
- Type gpedit.msc in it and click OK.

Now Group Policy Editor will be open and in it expand it as
User Configuration>Administrative Templates>System>Ctrl+Alt+Del Options---In the Right window panel look for the Remove Task Manager and Double Click on it.

Select Not Configured option and click on OK button.

Method 2: By Changing the Registry Settings
- Open Run command [Win+R].
- Type regedit and click OK.

HKEY_CURRENT_USER\Software\Microsoft\Windows\CurrentVersion\Policies\System
In the Right window pane look for the DisableTaskMgr. Right click on it and click on Delete.

Restart now..
Enjoy !
Thursday, November 17, 2011
Tips & Tricks : Remove CMOS Password. by james
The simplest way to remove a BIOS password is to simply remove the CMOS battery. A computer will remember its settings and keep the time even when it is turned off and unplugged because these parts are powered by small battery inside the computer called a CMOS battery. If we pull out this battery, the computer will forget alot of its hardware settings, including its BIOS password.
 A BIOS password is a protection measure that can be used to stop someone powering up a computer system or making changes in some of the computers most sensitive areas.
Here are some methods to bypass or remove a BIOS password.
Any laptop computer has a CMOS battery also known as RTC battery. The CMOS battery connects directly to the laptop system board and helps to retain important BIOS settings such as system time, date, BIOS configuration while the laptop is turned off or even when the main battery is removed.
The CMOS battery is rechargeable and it’s getting charged when the laptop is plugged into the mains.
 Here’s another type of CMOS battery. Basically, it's coin cell batteries but they are bundled and have a cable which plugs into the system board. This battery is removable and replaceable.

Take out the CMOS battery and wait 10 – 25 minutes before putting it back in. The reason for this wait is because the computer can still store power in its capacitors even though everything is unplugged. The waiting period allows enough time for them to discharge.
Plug everything back in, power up the computer and enter the BIOS again. If everything went well there should be no more password. In some cases, if you get weird error messages during bootup now, you will need to goto “Load BIOS Defaults” in BIOS and save the changes to fix them.
Assemble now your laptop..
Note : Make sure all screw and other parts are get back in original position.
Restart now.

Here are some methods to bypass or remove a BIOS password.
Any laptop computer has a CMOS battery also known as RTC battery. The CMOS battery connects directly to the laptop system board and helps to retain important BIOS settings such as system time, date, BIOS configuration while the laptop is turned off or even when the main battery is removed.
The CMOS battery is rechargeable and it’s getting charged when the laptop is plugged into the mains.
Take out the CMOS battery and wait 10 – 25 minutes before putting it back in. The reason for this wait is because the computer can still store power in its capacitors even though everything is unplugged. The waiting period allows enough time for them to discharge.
Plug everything back in, power up the computer and enter the BIOS again. If everything went well there should be no more password. In some cases, if you get weird error messages during bootup now, you will need to goto “Load BIOS Defaults” in BIOS and save the changes to fix them.
Assemble now your laptop..
Note : Make sure all screw and other parts are get back in original position.
Restart now.
Tuesday, November 15, 2011
Laptop Screen inverter board : Tips and tricks
In this post I explain how you can fix a laptop Inverter problem ( lights failed )
These are the other ways to fix it. Tested by me :D
This repair might apply to some ACER laptops and probably some other laptop brands.
Do you have a problem with the backlight on your laptop? If yes, you are not alone, that’s one of the most common laptop problems. In most cases the screen inverter is the culprit. Here are some LCD screen backlight failure symptoms that could be related to a bad inverter board:

NOTE: if you cannot see an image on the screen (not even very dim image), most likely you have a different problem and there is nothing wrong with the screen inverter.
First of all, unplug the AC adapter and remove the battery.
In order to access the inverter board you’ll have to remove the LCD screen bezel. On most laptops screws are hidden behind screw seals. In this case we have 5 screw seals on the front. Carefully remove the seals with a sharp object and glue them on the LCD bezel, in this case you will not lose them. Remove all screws and mark them somehow so you are not confused when you assemble the notebook back.
 Carefully lift up the FL inverter and rotate it a little bit. Unplug cables on both sides. The left side of the inverter board connects to the video cable, the right side to the backlight bulb (CCFL tube) inside the LCD screen. Remove the inverter and replace it with a new one.
After removing inverter, lets see this my procedure.

 In this action, just email me or leave a comment.
Testing now.
 There is no guaranty this method works all the time. While doing this repair you may damage the motherboard and make it unrepairable. Also, you may damage the laptop while taking it apart.
Proceed at your own risk and don’t blame me if you turned your laptop into a very expensive door stop.
If you don’t feel comfortable doing this repair, take your laptop to the repair shop.
Or send an email to me. or call us to 09302304513, itr's free..
These are the other ways to fix it. Tested by me :D
This repair might apply to some ACER laptops and probably some other laptop brands.
Do you have a problem with the backlight on your laptop? If yes, you are not alone, that’s one of the most common laptop problems. In most cases the screen inverter is the culprit. Here are some LCD screen backlight failure symptoms that could be related to a bad inverter board:

NOTE: if you cannot see an image on the screen (not even very dim image), most likely you have a different problem and there is nothing wrong with the screen inverter.
First of all, unplug the AC adapter and remove the battery.
In order to access the inverter board you’ll have to remove the LCD screen bezel. On most laptops screws are hidden behind screw seals. In this case we have 5 screw seals on the front. Carefully remove the seals with a sharp object and glue them on the LCD bezel, in this case you will not lose them. Remove all screws and mark them somehow so you are not confused when you assemble the notebook back.

After removing inverter, lets see this my procedure.


Testing now.

Proceed at your own risk and don’t blame me if you turned your laptop into a very expensive door stop.
If you don’t feel comfortable doing this repair, take your laptop to the repair shop.
Or send an email to me. or call us to 09302304513, itr's free..
Monday, November 14, 2011
Laptop Screen inverter board

Laptop inverter boards (also know as LCD inverter, FL inverter, screen inverter, backlight inverter) come in different shapes and sizes. On the picture above you see some typical looking inverter boards found in laptop computers.
The inverter board works as a power supply for the backlight lamp mounted inside the LCD screen. The inverter board converts low voltage DC power (few volts) supplied by the motherboard to high voltage AC power (few hundred volts) needed for the backlight lamp.
When the inverter board works properly, the backlight lamp gets power and the LCD screen lights up. As a result, the image on the screen is bright.
HOW INVERTER CONNECTED TO LDC SCREEN
On the picture below you can see a typical laptop display assembly which includes the LCD screen, video cable and inverter board.
One side of the inverter board connects to the backlight lamp and another side to the video cable (LCD screen cable).
One side of the inverter board connects to the backlight lamp and another side to the video cable (LCD screen cable).

HOW INVERTER MOUNTED INSIDE LAPTOP DISPLAY PANEL
In most laptops the inverter board is mounted below the LCD screen as it shown on the picture below. You can get an access to the inverter board when you remove the screen bezel – a plastic frame around the LCD screen.

TYPICAL INVERTER FAILURE SYMPTOMS
Usually inverters fail in one of the following ways:
1. When you turn on the laptop, the screen lights up for a short period of time and then goes dark. You still can see an image but it is very dark, almost invisible and definitely not usable. When you restart the laptop, the screen lights up and then goes dark again. The laptop works fine with an external monitor.
2. Your laptop turns on but the screen remains dark all the time. You still can see a very dim image outline. The laptop works fine with an external monitor.
3. The laptop screen works fine for hours or even days, but sometimes it goes very dark as it mentioned above. When you restart the laptop, the screen works fine again.
Inverter failure symptoms are very similar to backlight lamp failure symptoms and in most cases you cannot tell which one is causing the problem until you replace either the inverter board or the backlight lamp. From my personal experience, inverter boards fail more often than backlight lamps. If you have to guess, replace the inverter first.
Tuesday, November 8, 2011
Blackberry Tricks & Tips
Let's we learn how to repair our Blackberry smart phone. In this post (image below) is how to repair keypad trouble / keypad problem for Blackberry 8310 and 8320 series.

Picture : Keypad track ways of Blackberry 83xx series.
But remember, this thread only used for spesified or professional person only. Use on your risk. And I hope it's helpful..
These are the other some tips :
Click me to Download..
Thursday, November 3, 2011
App 2 SD Pro 2.41 (NEW)(ANDROID)

App 2 SD helps you to get more free internal phone storage space
Are you running out of application storage?
Do you hate having to check each and every app if it supports moving to the SD card?
Do you want an app that automatically does this for you and can notify you when an app can be moved?
App 2 SD streamlines the movement of applications to on your device's external or internal storage through your device's Settings. With this handy app, you'll have more control over your ever expanding collection of apps. This app is crucial to anyone who has memory management issues.


DOWNLOAD TO YOUR ANDROID
QR CODE:
QR CODE:

Radardroid Pro 2.45 (NEW)(ANDROID)
GPS speedtrap warning app
Radardroid will give a visual and audible warning when you approach any fixed or mobile speed camera in the application database. This application will reduce possible speeding tickets thanks to the ever increasing available features. Please, check out our free Radardroid Lite application to get to know our apps.


Sunday, July 3, 2011


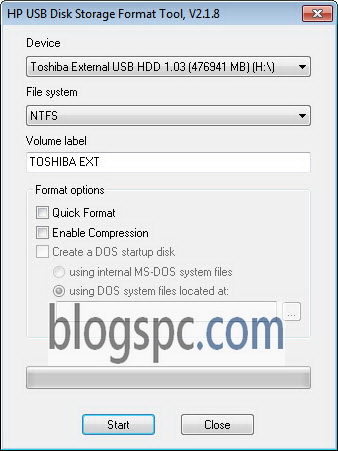
HP USB Disk Storage Format Tool
For you who want to re-format a USB Flashdisk using the Windows facility but keep failing you can use a free program “HP USB Disk Storage Format Tool“. This HP developed program is already popular in managing formatting USB Drive. This program is able to format all type’s of USB Drive, unless its already broken or undetected.
Even though this program is based for HP (Hewlett-Packard) but it is compatible with other brands. The other advantage of this program is its capability to re-format an USB Flasdisk bigger than 32 GB. This is one of a solution for all you who have problems for your USB
Monday, June 27, 2011
FreeRapid Downloader v0.8

FreeRapid's a simple Java downloader that supports downloading from Rapidshare and other file-sharing services. Simply copy and paste your links from a browser to this application. FreeRapid Downloader will handle the rest itself. No more clicking or uncomfortable waiting.
Main Features
*support for concurrent downloading from *multiple services
*downloading using proxy list
*download history
*smart clipboard monitoring
*automatic checking for file's existence on server
*auto shutdown options
*automatic plugins updates
*simple CAPTCHA recognition
*works on MS Windows, Linux and MacOS
*easy to use
*multilanguage interface - Czech, Danish, English, French, German, Hungarian, Chinese, Indonesian, Italian, Japanese, Polish, Slovak, Spanish, Ukrainian
*looks amazingly
*simply works!
Link
James32
Sunday, May 15, 2011

Thursday, May 5, 2011

Wednesday, May 4, 2011
Nokia RPL maker - Calculator | TDS Tool

RPL files for the DCT4 and DCT4+ generation of Nokia
mobile phones. The files are compatible with all models
that have the combination of UPP + UEM chipset. Generated
files contain 2 sections: DATA1 and DATA2, those are needed
as follows:
DATA1 - data goes into HW PMM area of the phone(bottom 0x100 bytes
in the flash chip)
DATA2 - data goes to the OTP area of the UEM chip, used by HW logic
to lockdown security watchdog timers
Both areas are related, as DATA1 contains encrypted UEM WD unlock password
To calculate just enter UEM/ESN and press Calculate. File will be created
in the program directory. Then load to the phone with our favourite flasher.
This is a free release, with the hope will be usefull to the community.
http://www.mediafire.com/?ksb9fqrafagsgpr
iphone 4 _ 4.2.1 Custom_Firmware (Activated) Jailbreaked
this Custom_Firmware is activated & Jailbreaked
included Cydia
not update your baseband
open cydia install ultrasn0w_1.2 for unlocking
Download
Part 1
Part 2
Part 3
Part 4
Nokia 6760s slide MIC microphone problem jumper ways solution
Nokia 6760s slide MIC microphone problem solution
This is a solution for Nokia 6760s with microphone problem, this will give you some hints on how to fix it.
The given images below shows which components needs to check before doing any replacements.
On Nokia 6760 slide the digital microphone is mounted on the flex cable ribbon assembly. Therefore, you may need to visually check the whole flex cable wire assembly, clean the flex pin connector before proceeding to check any other associated components that is connected to the MIC.
Now, to make it quicker and easier, you may try to replace the whole flex assembly if you have it available to avoid some hassles and saves a lot of time. This is the most convenient part on fixing the Nokia 6760 MIC problem.
But, if you don't have any replacement flex cable assembly replacement or having hard time where to buy it, and also seems that the flex is okay, you may refer to the solution below for it helps on how to diagnose the problem.
Here's how to troubleshoot The Nokia 6760 MIC problem, you'll only need a little bit of your effort and skills:
1. Check the resistors resistance near the microphone. Replace or just short it for a while. Test the phone.
2. Replace the MIC filter IC or remove it and apply the jumper solution. Then have a test the phone again
3. Replace the digital microphone.
If all of the above procedure doesn't solved the problem, or already tried replacing the whole flex cable assembly but nothing happens, the possible problem may lies on the power IC (AVILMA)
A re-hot or reworking it might only fix the problem. Then replace it if necessary.

Nokia X2-01 Not Charging Problem Jumper Ways/Tracks Solution
Nokia X2-01 Not Charging Problem Solution
Here's the solution for Nokia X2-01 if ever encountered a not charging problem.
The solution below provides the connection line paths of the charging circuit.
To fix the problem, you may first ensure that the wall charger you are using is properly working and the battery is not totally drained. Continue by checking the charging pin connector or DC jack connector, visually check it for possible damaged. Clean the PCB board charging pads and battery connector. If the problem still occurs proceed to components troubleshooting.
First check the fuse if open or damaged, second check the diode if shorted. Check the 330hms resistor near the power IC. Re-solder or replace if damaged. Trace the VCHARGE (charging voltage) line paths and the ground of the charging pads.
If the procedures above doesn't solved the charging problem, the possible faulty is the power IC. Rework or replace if necessary.

Friday, March 4, 2011

Sunday, February 27, 2011
Nokia C3 Insert Sim Card Solution with Filter IC Jumper Tracks
Nokia C3 Insert Sim Card Solution with Filter IC Jumper Tracks
Here's the Nokia C3 insert SIM card solution that can be used to solve and fix if the device unable to accept or accept any working SIM card module being inserted to it.
This solution shows the connection lines paths of Nokia C3 sim card circuit on the PCB board layout. By using this solution you can easily determine which components or parts needs to check and or replace.
Nokia C3 Insert Sim Card Solution with SIM Filter IC Bypass Jumper 
In most cases by only replacing the SIM filter IC may only fix and repair Nokia C3 insert Sim card problem.
Password Breaker 2010 [Mediafire]

Password Breaker 2010
Extract And Install, Register Use Tools
2) Windows XP Admin Password Remover
3) Zip File Password Cracker
4) SQL Password Remover
5) Microsoft Office Password Remover
6) Windows Vista Admin Password Recovery
7) Windows Password Recovery
RAR File Password Cracker
9) EXE File Password Recovery
10) Password Changer
11) Password Memory
12) Distributed Password Recovery

http://www.mediafire.com/?lvwrl9od82ek2q8
Wednesday, February 23, 2011
Not charging solution for Nokia 5130

For a charger no response or indication when the battery charger is plug in to the nokia 5130 device, this solution may help solve the problem.
this solution may simply show which particular components to check and replace during repair. The picture guide above shows the location of the chip fuse , filter coil, filter capacitor and a protection chip diode that might damaged when the charging problem ocurred.
Tuesday, February 22, 2011
Sony ericcson hardware picture all trick jumper,all model
Sony ericson hardware picture all in one !
j100
J-100 Charing_2
J-100 Mic
J-100 MIC_1
J-100 SIM WAYS
J-100 speaker-1
J-100 speaker
J-100 vibra
j100 ear piece
j100 speaker ways
J200_J210
J200 buzzzer ways
J200 Blue LCD
J200 DISplay
J200 microfon and speaker
J200 ringer ways
J200 SIM WAYS
j200-j210i no lcd solution
j200i dead
J200i Joy stick
J200i mic soluition
j200i_mic_soluition1
j200i_riger
j200_j210_joystick_ways_new_edition
j200_manual
j200_no_ear_piece_sound
J210i joystic and keypad
j210_LCD_repair
J220_J230
J220 J230-keypad-ways
J220_J233keypad ways
j230 speaker
J230 Sim Card Solution
SE J230i charge
J300
j300i charging
j300i mic solution
J300i Insert Sim
J300i_joystick_solution
J300i_joystick_solution2
K300 Sim Way
k300i_ligt problem
K200
K200i charging
K300
COMPONENT PLACING
K300 charging-pro
k300 jostick and key ways
k300 mic hand free
K300 microfon
K300 PA change from Mot T191
k300 ringer
K300 sim ways
k300-500-700 no buzzer solution
k300-500-700 hadfree
k300 Hand free by mic problem
K300i K700 microfon
K300i ptimized Charging
k300i_k700i mic solution
k300i_light
k300_20key
k300_charging_problem
K300_K500_K700_key+joy
K300_scheme_sim
k300_yoistic
K310_K510
K310 joy.
K310i lcd light problem
K310_Joystick solution
k310_mic_
k510.rar
k310 BACKLIGHT
K310 auto charging
k310 mic ways
k310 mic ways
K310 Sim Solution
K310-K510-Sim Ways
k310-led.rar
K310-Sim
K310_510_sound_IC
K500_K508
RSI- K700,K500_Alien battery_or_Capacity_Problem
COMPONENT PLACING.
handfree new
K300_K500_K700_key joy
k500 k300 k700 Handsfree problems
K500 K700 network problem 1800 or 900
k500 keypad ic bypass
K500 keypad
k500-SIM
k500i_joystick_solution
k500i_keypad_solution.
k500_ ant swich
k500_k508_F500_display _sche
K500_Knatte chip
K500_LCD_LED.
K500_microphone.
K500_microphone_comp_layout
k500_nosim.
Se k300 k500 k700 sim problem
SonyEric_K500 k700 audio1
K550
K550 keys
k500 mic
k550 mic2
K550 charge ways
K550 MIC JUMPER
K600
K60x_Test_Point_and_disassembling_manual_v2
k600 power switch sche
K600 system conector
K600 joystick repair
K600i key and joystik ways
k600 key board and joystik
S-E Microfon
K610_V630
k610 handfree mode
K610 charging
K610 MIC JUMPEr
K610 sim1
K610 sim2
K610 hands free
K610i Micways
K610i LCD
K610i_V630i_sim_ways
k610_mic_ways.
k610_SIM
t610 new on off ways
K700
F700 F500 not charg
700 camera.rar
k300 mic hand free copy
k700 back light.
K700 antenna switch.
k700%20lcd
k700 Modify light
k700autoonof
k700 component placing
k700 hangat menu.
k700i_hang_solution_
k700i_joystick
k700 microfon
k700_joystick_solutions_
mic k700
S700charge.
Sony Ericsson_K700I_repair_light_display
Sys conector K700
T230 LCD light not working.
K750
750 volume key
1 2 3 left software key
k750 Camera
K750 keypad
k750 w800 w700 lighat problem
K750-charging
k750-joystik.
K750-Lsd licht
K750-W800 HUNG
k750 Bluetooth problem
k750 charing problem
k750contrast-1
K750I DISPLAY KEy PAD SOLUTION-1
K750I DISPLAY KEYPAD SOLUTION-2
k750i key pad jumper
K750i_4_IN_1_cable_modify_with_Auto_Power
k750i_charging1
k750I_SIM_WAYS1
k750 Joy jumper
k750 keyped problem
k750LCDlightjumper
k750 LCD way repair
k750mic.
K750 on off and iluminations
k750 white screen
k750_cam
K750_charging
k750_joy_shem
k750_w800_repair microphone_
k750 mmc_
Label_Info
N2980_comp_placing.
Part List.r
repair_LED_LCD_K750_W800
Trouble_Shooting_Guide
W700I MIC WAYS.
zatvor camer k750
K790
Joystic ways k790
K790 not power on
K790
k790 lcd_keypad light schematic
k790_joystick_component
k790_joystick_sche
K790_K800_Joystick_Way
K790_white _display
K800
K790_K800_Joystick_Way.
K800 charging problem
K800 IC Missing
K800 key ways
K800 primary side
K800 secondary side
k800 speaker
k800-illumination
k800i keypad
K800 joystick way
k800 key board ways
k800 lcd light
k800
K800_knopki.
SIM_WAYS -750
speaker
M600
P800
P800 no charging
P800 charging.
P800 charging2
p800 signal problem
p800 no charging
P800_LCD_Connector
P800_LCD_DC_Converter_part_
P800_N560_LCD_DC_Driver_Layout
P990_P910
mic p900
P900 lcd ways
P900 mic
p900 speaker ways
p910 p900 charge ways
p900 910 not charging
P990
p990 mic ways
P990 charging way
P990_ring ear
T20
T20 self charge
T68
T65_1.rar
T68_Buzzer.
T68_Earphone.
T68_Joystick
t68_joystick_connections
T68_lcd
T68_lights
T68_lights_2
T100
ericsson_t100_solution_signal
SE_t10x_antena_switch_solution
solution_low_signal T100
T100 keypad
t100 audio
T100 ringer
T100_not_charging
T200
Parts on the plate T200
t200 audior epair
T200 lcd
T230_T290
hand free t230
PA200061
T230 jumpering glass IC
T230 key 7,8,9,Up not working
T230 antena switch
t230 buzzer.
T230 LCD light not working
T230 Pic microfon
T230 290 ON just with change
t230ringer
T230_charge.
T230_charging
T230_key
T230_LCD_Connector
T230_LCD_Connector_Layout
t230_mic_detai
t230_mic_repair
t230_msinter
T230_speaker.
T230_T290 SIM ways
T230_T290 keypad solution
T230_T290_ keypad solution.
T230_t300_sim_interface
T300
T300_sim_interface_coom
T300_sim_interface_layout.
T310
T310 audio
T610_T630
SOLUTION MIC 610
SOLUTION MIC T610
t610 camera ways
T610 lcd ways
T610 LSD.
T610 MIC WAYS
T610 not charging
t610 sim ways
T610 keys
T610 Microfon
T610 switch repair
t610-630 buzzer way
T610-T630_joystick
W200
W200_k310_K510 insert sim
W300
w300 keypad
w300 ringer
w300 charging Way
w300i sim component
w300i sim sche
w300i-mic components
w300_displaysinluz.
W300_mic
W300_Sim_Ways
W850i ways
W550
W550_Schematics + PCB.
w550 LED 1
w550 LED2
w550 keypad
w550i-mic jumper
W550_Schematics + PCB[1].part1
W550_Schematics + PCB[1].part2
W550_Schematics + PCB[1].parrt3
W550_TP
W580_s500
S500_W580_audio
W600
w600_display.rar
w550-power witch components
W550i Side speaker jumper
w550i-600 mic jumper
W700
W700i mic ways
W800
w800 camra
k750 mic ways
k750 w800 hung insert memory card
k750 mic
k750_w800 hang
W810
k750 speaker
k750_w810 audio
w810 key ic jumper
w810
w810 back light
w810 key pad solution
w810 light
w810 mic
w810 no lcd light
W830
W830 MMc
W850
W850 ways
W880
W880mic
W910
W910 cheeking sim ic
Z200
Z200 LCD light
z200 no display solution
z200 charging way
z200 charging
Z300
Z300 sim
Z800
z800 sim ic
http://www.zshare.net/download/51946106433716f6/
Thursday, February 10, 2011
Nokia 6303c classic, solutions for hardware repair
Nokia 6303c classic, solutions for hardware repair

These are picture collection serve as a guide on troubleshooting Nokia 6303c classic hardware problem related failures, this collection contains the following images, Microphone solutions, Ringer buzzer solutions, charging solutions, Earpiece nad mouthpiece solution , MMC memory card problem solution.

nokia 2690 keypad IC jumper ways and line tracks, full solution
nokia 2690 keypad IC jumper ways and line tracks, full solution
Here's the full and complete solution for Nokia 2690 Keypad line tracks and keypad filter IC jumper ways including the power on-off key connection. This solution below may possibly help fix and repair a certain keypad malfunction that stop responding on a damaged Nokia 2690 cell phones.
Nokia 2690 keypad Line Tracks and filter Ic jumper ways solution with power ON/OFF key

Nokia 5130 LCD Display jumper ways solution
Nokia 5130 LCD Display jumper ways solution
Here's the LCD Display line paths tracing guide for heavy a and deep troubleshooting Nokia 5130 LCD Screen Display problem such white scree, blue scree, blank or black screen, garbled and saturated screen displays. This solution shows the exact location where each corresponding LCD pin connector connected to a particular components for easy line tracing procedures.
This first solution shows the voltage supply to the LCD display module that feeds to the pin connector. You may check, trace this particular voltages first.this also includes the LCD display backlight LED corresponding current and voltage pin configuration. If this voltages are not present this will also result to display problem issues.
Nokia 5310 Xpressmusic LCD display supply voltage
and baclight LED's pin connections

And this solution corresponds to each and every LCD display data signals connection to the pin connector that being feeds from the application processor (CPU IC) through to the LCD display module.
Nokia 5130 LCD display pin connection configuration ( display jumper ways )

All these lines is connected to an Filter chip resistors the has a resistance value of 33 ohms per each resistor.
You may check, trace, replace this particular chip resistor if found damaged. And if found an open line paths, just try to manage applying a jumper wire on it for that is the only option.
Nokia 5130 keypad solution, keys and switches connection tracing guide for repair
Nokia 5130 keypad solution, keys and switches connection tracing guide for repair
Here's the Nokia 5130 complete keypad solution, this solution shows each certain keypad key connections including the button switches such as the volume up and volume down control buttons and also the MP3 player button switches such as the Start/stop, forward and rewind button switches.The solution may help repair and fix nokia 5130 keypad malfunction and button switches failure. You may check, trace particular keys which are not able to function by using the repair guide below. Each group of colors indicates that they are connected with each other. So just locate where that particular non working key being connected and mend it found cut or open.
Nokia 5130 xpressmusic keypad keys malfunction full tracing solution

The Power ON/OFF key is isolated and not connected to other group of key connection for it only holds for switching or powering up the device. There is an open spots near the keypad filter IC that the power ON and OFF key can be connected when the power key fails or or if the line is cut or open.
Nokia 5130 ON-OFF power key jumper ways

And here's the internal connection of the keypad filter IC, you may check and apply a temporary jumper on this components to ensure that the inner line paths from the application processor is not being damaged.
Nokia 5130 keypad filter IC jumper ways

Nokia 6600i slide Not Charging Problem Solution Tracing Guide
Nokia 6600i slide Not Charging Problem Solution Tracing Guide
Here's the 6600i slide Nokia mobile phone solution for not charging problem such as charger no response when the battery charger is inserted or plug-in. This solution shows the connection line paths of the charging protection circuit on Nokia 6600i slide on the PCB board for quick and easy tracing and check up procedures.
But first ensure that you already tried using another working or new battery charger and a new cell phone's battery before proceeding. A weak or drained mobile phone battery will not charge and shows no indications.
Nokia 6600i slide Charging Connection Line Paths

Here's how to troubleshoot the Nokia 6600i Not charging problem:
First check the charging pin connector for possible damaged, replace if necessary. Clean the charging pin terminal contact pads on the PCB board. Check or replace the fuse and the chip diode.
If the problem still exists, rework or replace the charging IC (Betty).
For fake charging or it shows charging indication but it doesn't stored or saved on the battery. This problem is also caused by a weak battery, battery connector and the BETTY IC.
Subscribe to:
Posts (Atom)